什么是ZXing
ZXing是一个开源Java类库用于解析多种格式的1D/2D条形码。目标是能够对QR编码、Data Matrix、UPC的1D条形码进行解码。 其提供了多种平台下的客户端包括:J2ME、J2SE和Android。
ZXing项目里面代码很多,实现的功能也很多,我们的应用只需要剥离其中的扫描模块即可,再多一点也就是生成二维码的功能;接下来我们就一起来精简ZXing项目,最终形成一个小的Demo案例,当然江湖上已经有过N多种版本的ZXing精简项目,什么横屏改竖屏,绘制扫描界面,开启闪光灯等等,并且许多都是基于ZXing2.3.0来做精简的,后续有许多更新的版本,包括自动对焦,Camera管理,bug修复等等新功能;笔者使用的是ZXing3.1.0版本,这里需要说明的就是我的这版Demo绝对是江湖上面还没有出现的,也算是一点点小小的创新把,那就是去除ZXing项目中恼人的ViewFinderView的绘制,使用XML布局扫描界面,添加扫描动画,精确计算扫描区域,怎么样?是不是很心动,很想继续往下看呢?那就跟我一起做起来把!!!
ZXing的下载地址: 传送门
克隆ZXing项目到本地
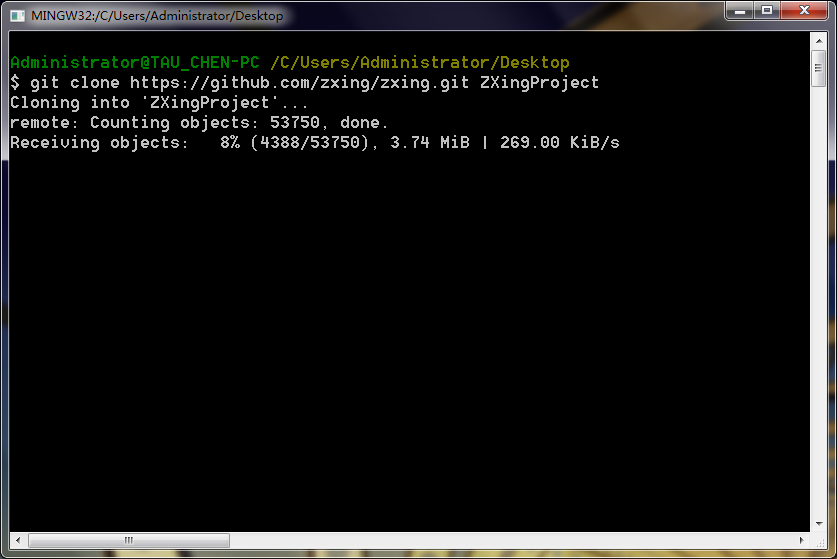
打开Git Base,敲入命令: git clone https://github.com/zxing/zxing.git
如下图所示:
当然你也可以直接点击Download ZIP
整理ZXing代码
打开ZXing项目的文件夹,可以看到如下文件:
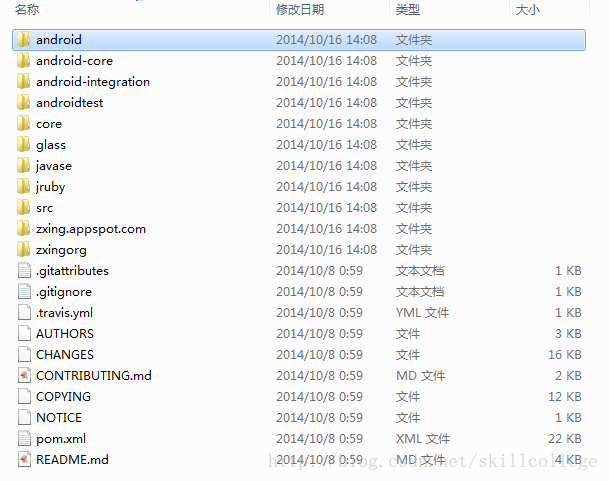
其中我们主要关注2个文件夹里的内容:
core文件夹
ZXing项目的核心代码,可以新建一个Java工程,然后export成jar来调用。如下图所示:
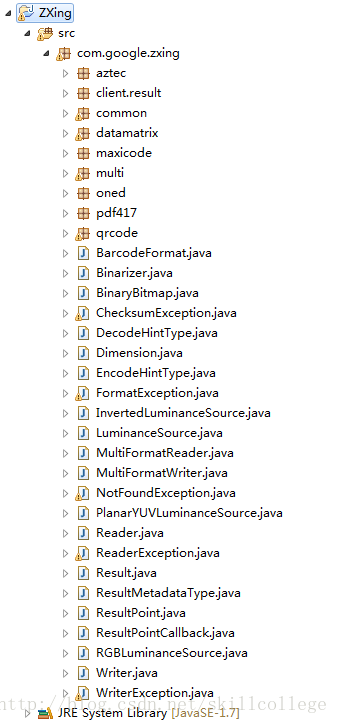
免打包即可获得的zxing-3.1.0.jar: 猛戳下载
android文件夹
Android示例工程代码,成功运行之后就是一个专业的扫码应用了。如下图所示:
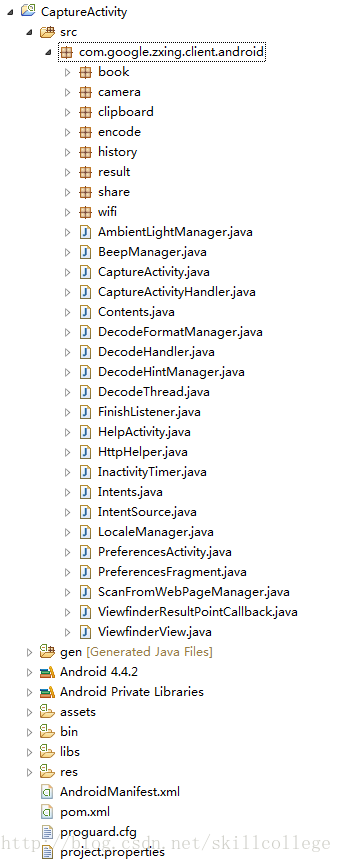
免引入免整理的zxing原始工程 ZXingRawProject: 猛戳下载
这么为你着想,还不感谢我么??!!
但是这样就让你满足了,那怎么可以说是极致二维码扫描呢,有木有感觉ZXing的扫描框的绘制很不爽啊?自定义的View绘制的很丑,多屏幕适配的时候还经常不兼容,原始项目还是横屏模式的,目前大家都习惯竖屏扫描呢。怎么办?别怕,我来告诉你,我要将ViewFinderView砍掉,使用xml界面布局,添加扫描动画,最终一样准确无误的扫描到二维码数据,只需要对准,是的,毫厘不差的对准就可以了。
精简ZXing代码,打造极致扫描
由于ZXing官方的项目源码有许多是我们不需要的功能,所以当我们只需要二维码或者一维码扫描的时候,我们只需要提取其中的扫描部分代码就可以完成我们的需求了,接下来我们一起来精简ZXing代码,打造极致扫描!!
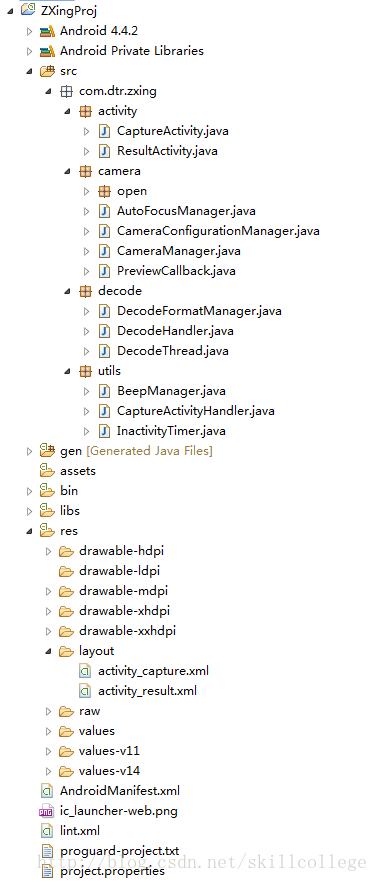
精简代码
去掉ZXing中一些和扫描无关的代码,最终留下的代码结构如下图所示,最关键的是你看不到ViewFinderView了,是不是很爽??
扫描布局界面
xml代码如下:
<?xml version="1.0" encoding="utf-8"?>
<RelativeLayout xmlns:android="http://schemas.android.com/apk/res/android"
    android:layout_width="match_parent"
    android:layout_height="match_parent"
    android:background="@android:color/transparent"
    android:orientation="vertical" >

    <SurfaceView
        android:id="@+id/capture_preview"
        android:layout_width="match_parent"
        android:layout_height="match_parent" />

    <RelativeLayout
        android:id="@+id/capture_container"
        android:layout_width="match_parent"
        android:layout_height="match_parent" >

        <ImageView
            android:id="@+id/capture_mask_top"
            android:layout_width="match_parent"
            android:layout_height="120dp"
            android:layout_alignParentTop="true"
            android:background="@drawable/shadow" />

        <RelativeLayout
            android:id="@+id/capture_crop_view"
            android:layout_width="200dp"
            android:layout_height="200dp"
            android:layout_below="@id/capture_mask_top"
            android:layout_centerHorizontal="true"
            android:background="@drawable/qr_code_bg" >

            <ImageView
                android:id="@+id/capture_scan_line"
                android:layout_width="match_parent"
                android:layout_height="wrap_content"
                android:layout_alignParentTop="true"
                android:layout_marginBottom="5dp"
                android:layout_marginTop="5dp"
                android:src="@drawable/scan_line" />
        </RelativeLayout>

        <ImageView
            android:id="@+id/capture_mask_bottom"
            android:layout_width="match_parent"
            android:layout_height="wrap_content"
            android:layout_alignParentBottom="true"
            android:layout_below="@id/capture_crop_view"
            android:background="@drawable/shadow" />

        <ImageView
            android:id="@+id/capture_mask_left"
            android:layout_width="wrap_content"
            android:layout_height="match_parent"
            android:layout_above="@id/capture_mask_bottom"
            android:layout_alignParentLeft="true"
            android:layout_below="@id/capture_mask_top"
            android:layout_toLeftOf="@id/capture_crop_view"
            android:background="@drawable/shadow" />

        <ImageView
            android:id="@+id/capture_mask_right"
            android:layout_width="wrap_content"
            android:layout_height="match_parent"
            android:layout_above="@id/capture_mask_bottom"
            android:layout_alignParentRight="true"
            android:layout_below="@id/capture_mask_top"
            android:layout_toRightOf="@id/capture_crop_view"
            android:background="@drawable/shadow" />
    </RelativeLayout>

</RelativeLayout>
计算截取区域
我认为你已经看了我的贴心注解内容了,否则。。。我不白啰嗦了么?
贴心注解: 如果你没有看上一篇ZBar扫描中关于扫描区域计算的解释,那赶紧回去,咱不能急,看完再来接上,否则你会不理解的!传送门
private void initCrop() {
    int cameraWidth = cameraManager.getCameraResolution().y;
    int cameraHeight = cameraManager.getCameraResolution().x;

    /** 获取布局中扫描框的位置信息 */
    int[] location = new int[2];
    scanCropView.getLocationInWindow(location);

    int cropLeft = location[0];
    int cropTop = location[1] - getStatusBarHeight();

    int cropWidth = scanCropView.getWidth();
    int cropHeight = scanCropView.getHeight();

    /** 获取布局容器的宽高 */
    int containerWidth = scanContainer.getWidth();
    int containerHeight = scanContainer.getHeight();

    /** 计算最终截取的矩形的左上角顶点x坐标 */
    int x = cropLeft * cameraWidth / containerWidth;
    /** 计算最终截取的矩形的左上角顶点y坐标 */
    int y = cropTop * cameraHeight / containerHeight;

    /** 计算最终截取的矩形的宽度 */
    int width = cropWidth * cameraWidth / containerWidth;
    /** 计算最终截取的矩形的高度 */
    int height = cropHeight * cameraHeight / containerHeight;

    /** 生成最终的截取的矩形 */
    mCropRect = new Rect(x, y, width + x, height + y);
}