大部分情况下,应用都是离不开数据库的,下面我们就开始对应用添加数据库操做。这里我们使用微软官方提供的Entity Framework 。
文档地址 https://docs.microsoft.com/zh-cn/aspnet/core/data/ef-mvc/?view=aspnetcore-6.0
1.添加依赖包,把Microsoft.EntityFrameworkCore和Microsoft.EntityFrameworkCore.SqlServer 一并安装上去
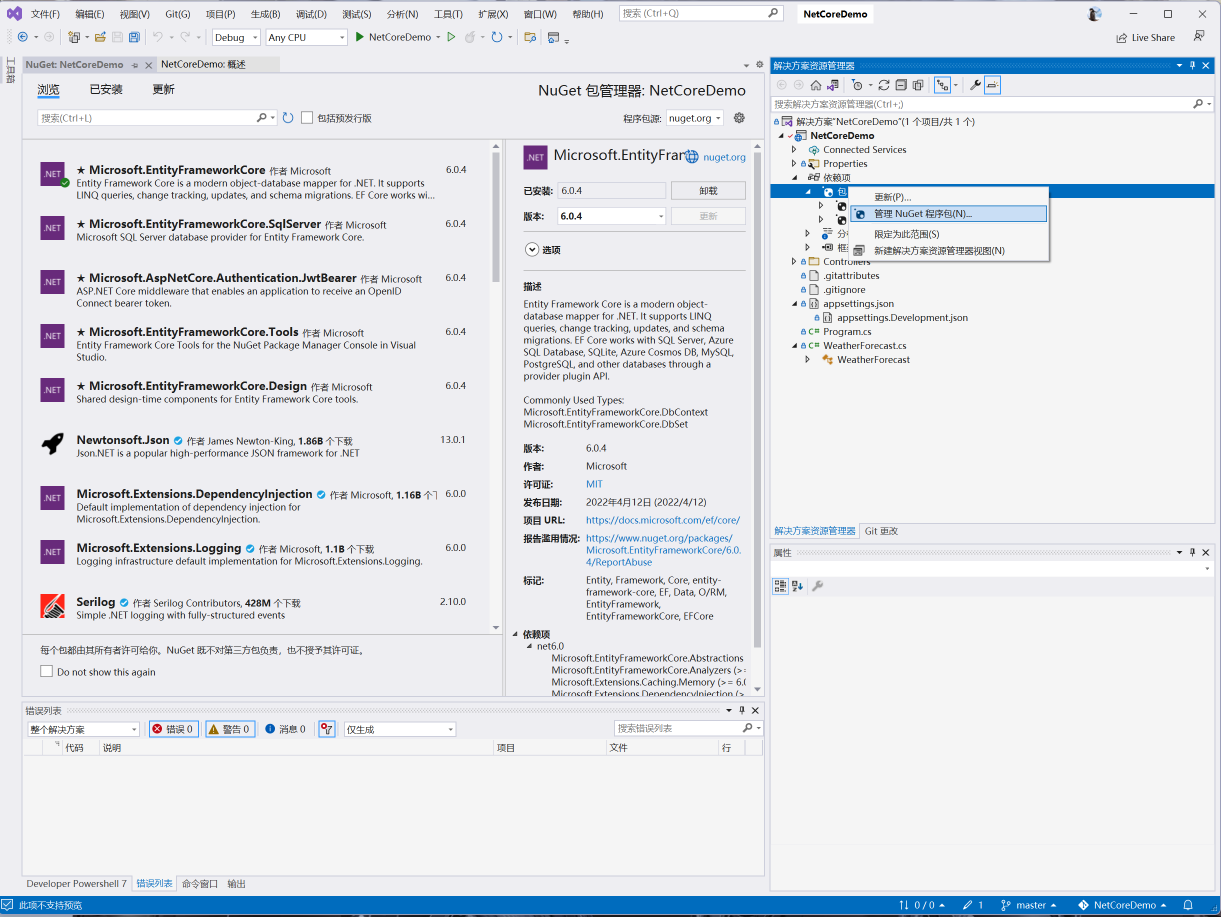
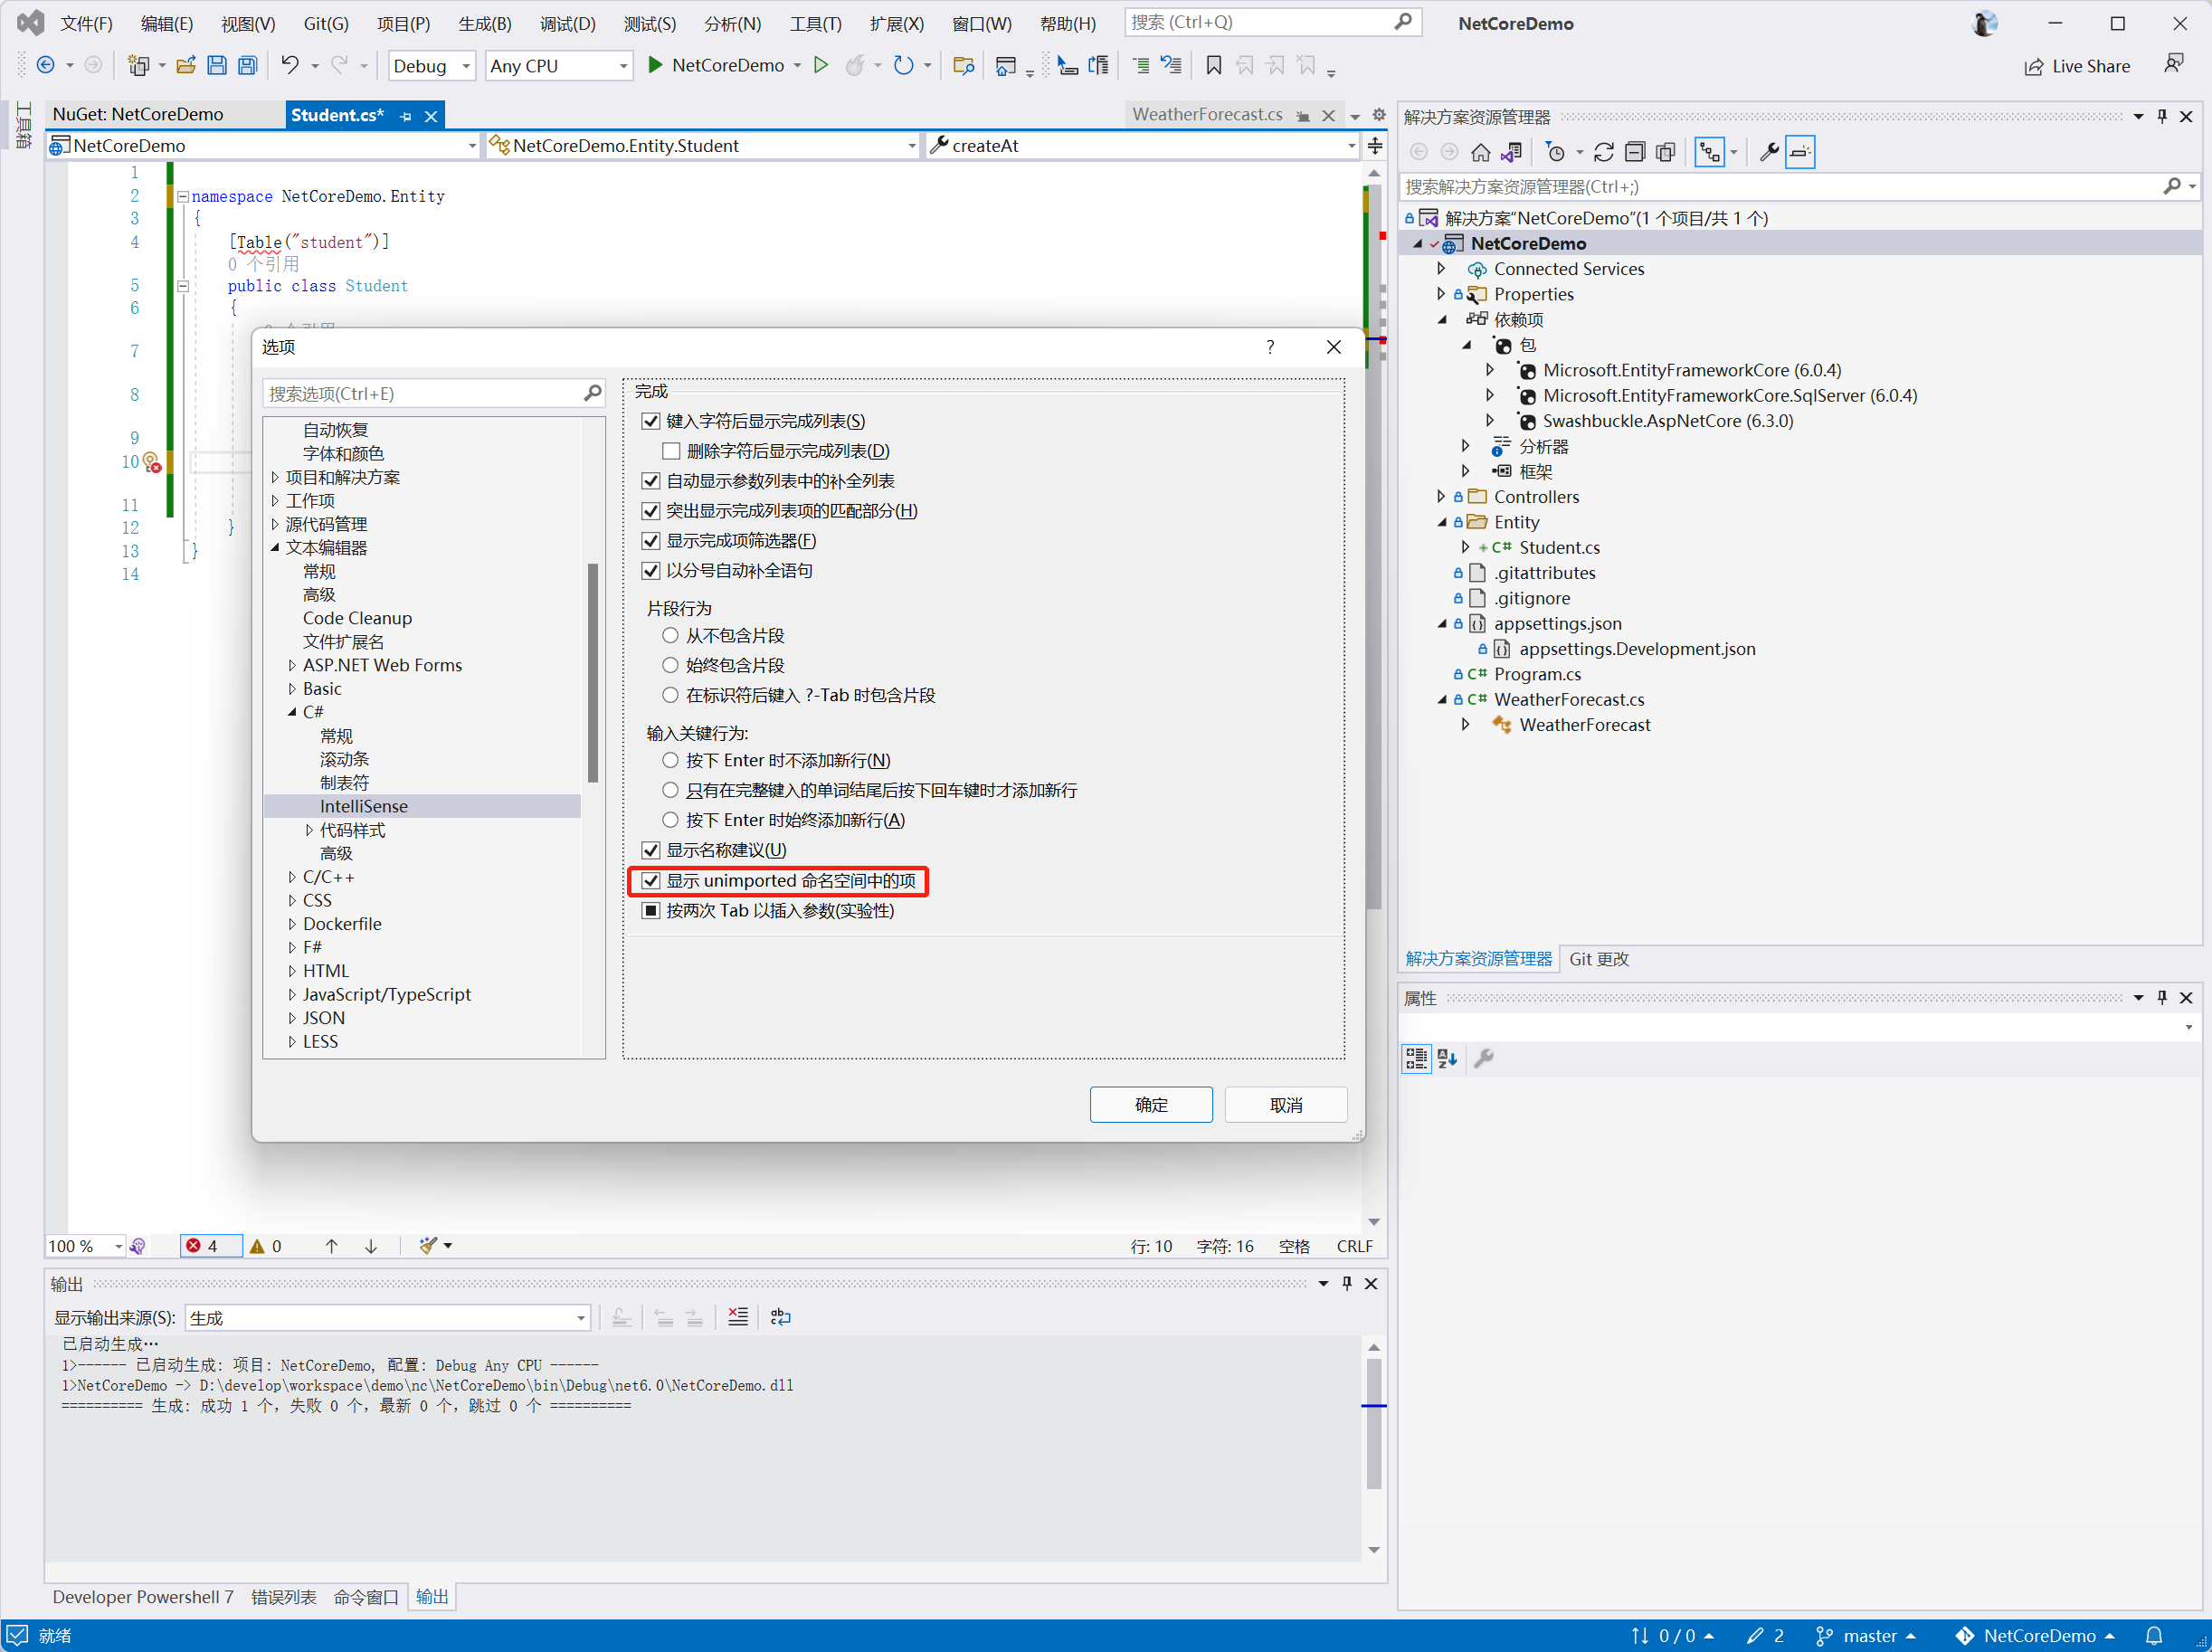
记得勾选下配置,否则没有using的包无法自动补全会很痛苦
2. 我们以一个Student表为例,开始这个demo
2.1 创建一个entity
using System.ComponentModel.DataAnnotations.Schema;

namespace NetCoreDemo.Entity
{
    [Table("student")]
    public class Student
    {
        [DatabaseGenerated(DatabaseGeneratedOption.Identity)]
        [Column("id")]
        public int ID { get; set; }
        [Column("name")]
        public string? Name { get; set; }
        [Column("age")]
        public int? Age { get; set; }
        [Column("create_at")]
        public DateTime? CreateAt { get; set; }
    }
}
由于个人习惯以及更好的与其他项目适配,我们会把数据库中的属性名称设置为下划线风格。
2.2 创建一个DbContext
using Microsoft.EntityFrameworkCore;
using NetCoreDemo.Entity;

namespace NetCoreDemo.Data
{
    public class DemoDbContext: DbContext
    {
        public DemoDbContext(DbContextOptions<DemoDbContext> options) : base(options)
        {
        }

        public DbSet<Student> Students { get; set; }


        protected override void OnModelCreating(ModelBuilder modelBuilder)
        {
            modelBuilder.Entity<Student>().ToTable("student");
        }

    }
}
2.3 创建一个StudentController
using Microsoft.AspNetCore.Mvc;
using NetCoreDemo.Data;
using NetCoreDemo.Entity;

namespace NetCoreDemo.Controllers
{
    [Route("students")]
    public class StudentController : ControllerBase
    {
        private readonly DemoDbContext _context;

        public StudentController(DemoDbContext demoDbContext) {
            _context = demoDbContext;
        }


        [HttpPost]
        public Student create([FromBody]Student args) {
            _context.Students.Add(args);
            _context.SaveChanges();
            return args;
        }


        [HttpGet("all")]
        public List<Student> GetAll() {
            return _context.Students.ToList();
        }

    }
}
2.4 给数据库加一点初始化数据
using NetCoreDemo.Entity;

namespace NetCoreDemo.Data
{
    public class DbInitializer
    {
        public static void Initialize(DemoDbContext context)
        {
            context.Database.EnsureCreated();

            // Look for any students.
            if (context.Students.Any())
            {
                return;   // DB has been seeded
            }

            var students = new Student[] {
                new Student{Name="小王",Age=12,CreateAt=DateTime.Now }
            };
            context.Students.AddRange(students);
            context.SaveChanges();
        }
    }
}
2.5 需要修改Program的代码
using Microsoft.EntityFrameworkCore;
using NetCoreDemo.Data;

var builder = WebApplication.CreateBuilder(args);

builder.Services.AddDbContext<DemoDbContext>(options =>
  options.UseSqlServer(builder.Configuration.GetConnectionString("DefaultConnection")));

// Add services to the container.
builder.Services.AddControllers();
// Learn more about configuring Swagger/OpenAPI at https://aka.ms/aspnetcore/swashbuckle
builder.Services.AddEndpointsApiExplorer();
builder.Services.AddSwaggerGen();

var app = builder.Build();

using (var scope = app.Services.CreateScope()) {
    var services = scope.ServiceProvider;
    try {
        var context = services.GetRequiredService<DemoDbContext>();
        DbInitializer.Initialize(context);
    } catch (Exception ex) {
        var logger = services.GetRequiredService<ILogger<Program>>();
        logger.LogError(ex, "An error occurred while seeding the database.");
    }
}


    // Configure the HTTP request pipeline.
    if (app.Environment.IsDevelopment())
    {
        app.UseSwagger();
        app.UseSwaggerUI();
    }

app.UseAuthorization();

app.MapControllers();

app.Run();
到这里 ,代码部分就完成了
3. 用docker部署一个sqlserver数据库
docker run -e "ACCEPT_EULA=Y" -e "SA_PASSWORD=moensunxxxxx"  \
    -p 1433:1433 --name sql1 --hostname sql1 \
    -d mcr.microsoft.com/mssql/server:2019-latest
4.修改数据库配置
{
  "ConnectionStrings": {
    "DefaultConnection": "Server=localhost;Database=Demo;Trusted_Connection=False;MultipleActiveResultSets=true;User ID=sa;Password=moensunxxxxx"
  },
  "Logging": {
    "LogLevel": {
      "Default": "Information",
      "Microsoft.AspNetCore": "Warning"
    }
  },
  "AllowedHosts": "*"
}
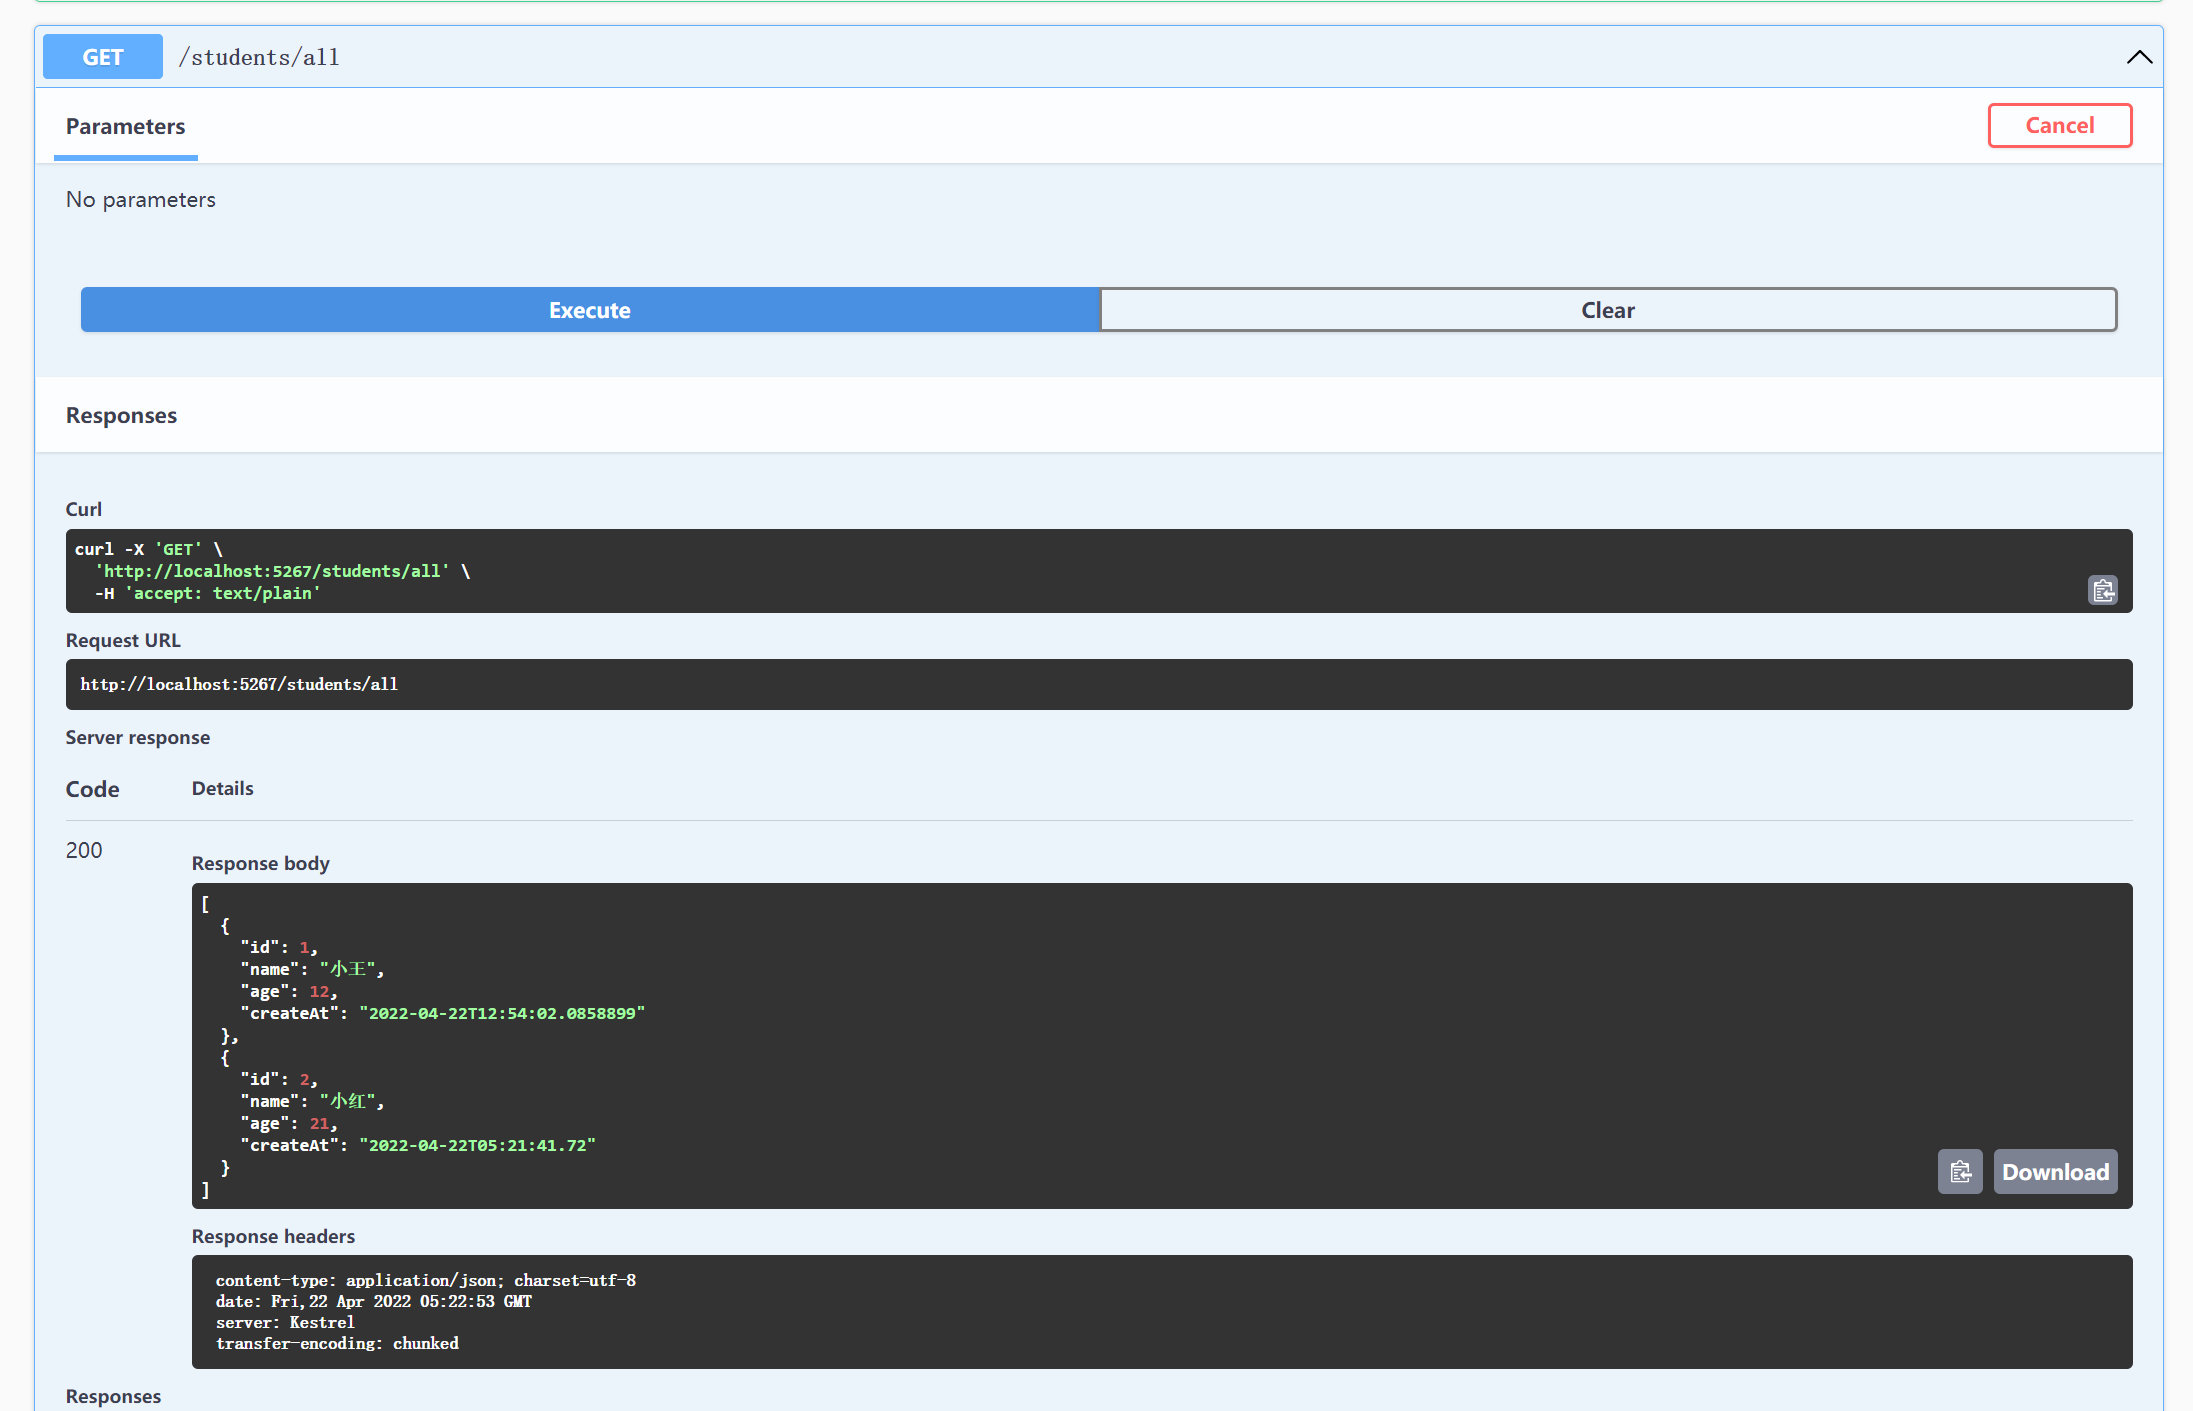
5. 运行看看
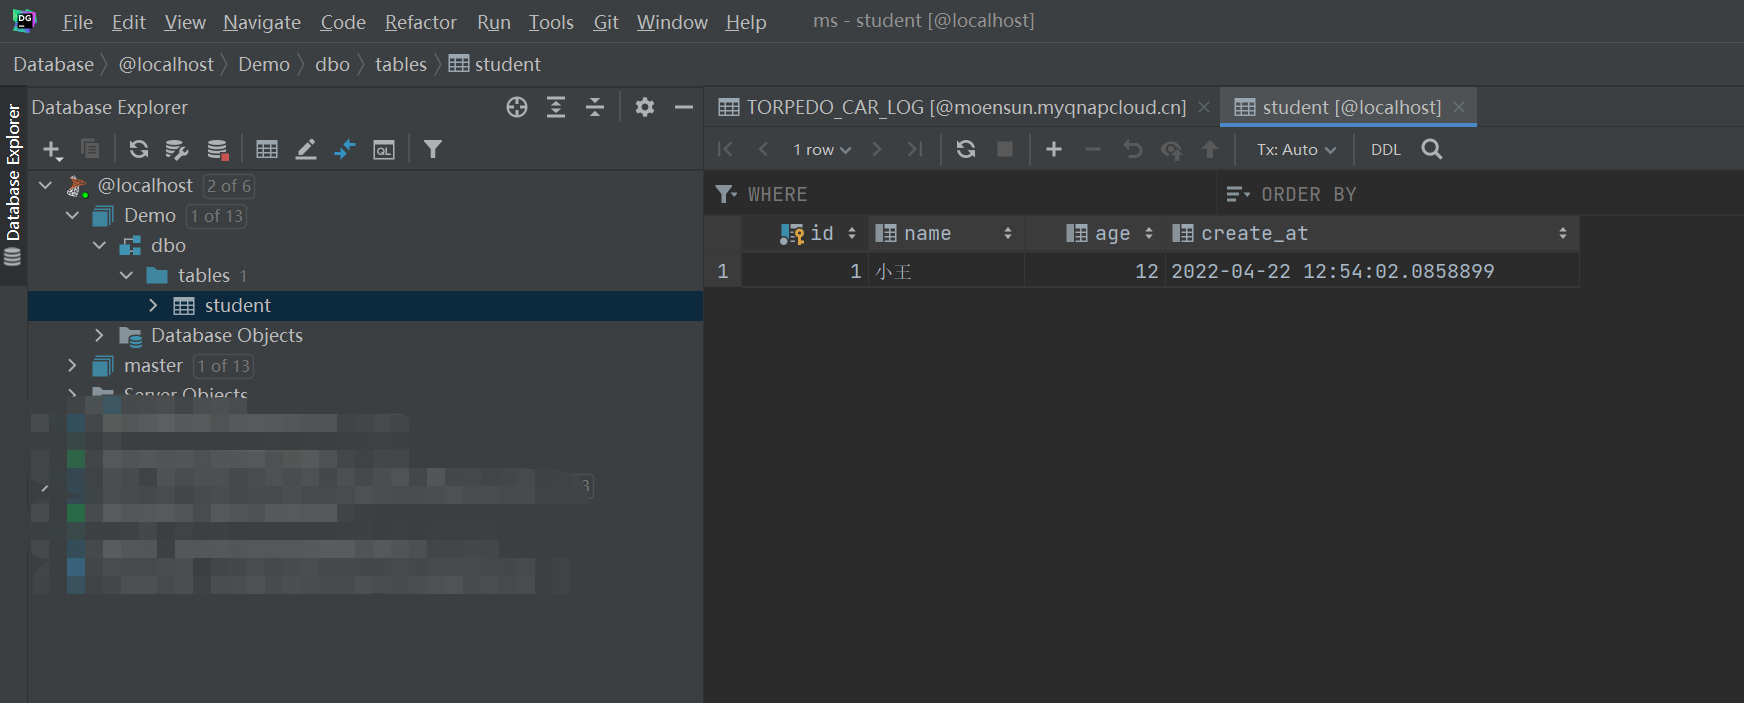
项目启动之后,数据库中的初始化数据已经创建成功
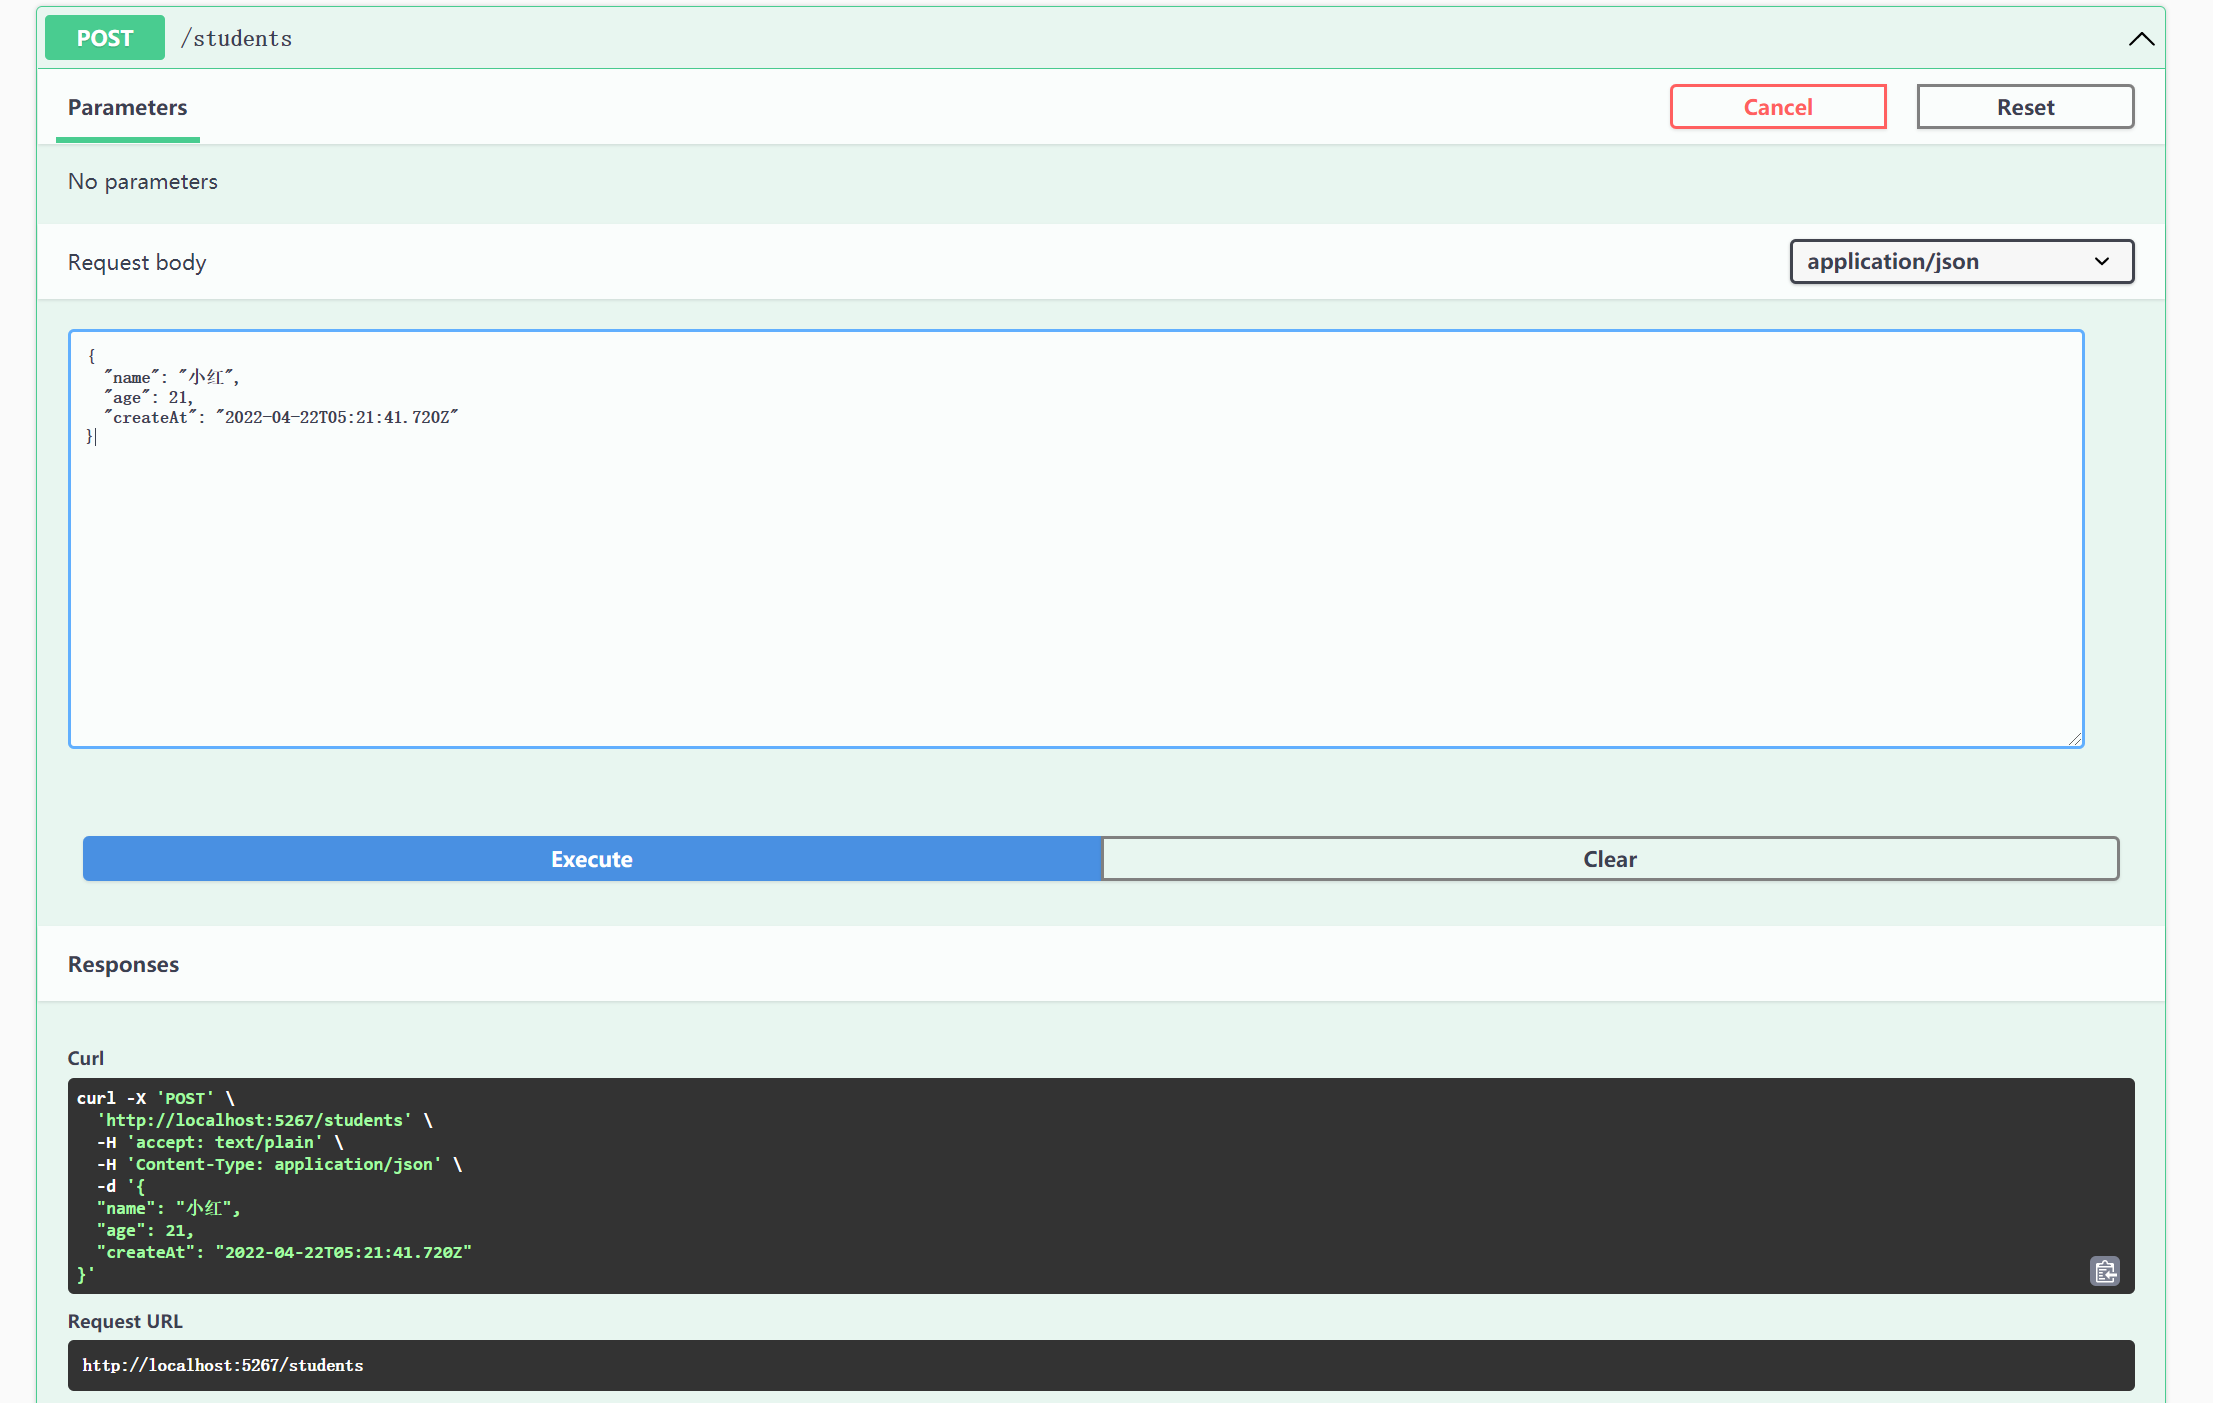
到swagger界面上,测试下接口试试
新增一条数据,执行没有报错
执行下查询全部数据,可以看到,上一步数据已经新增成功。
到这里,.net core 6 的数据库操作基本完成。后面的事后面再说。